How to Convert Any Website to Android App in Android Studio?
In this article , we will learn how to Convert Any Website to Android App in Android Studio. follow the steps below to Convert Any Website to Android App in Android Studio
Step 1: Create a New Project in Android Studio
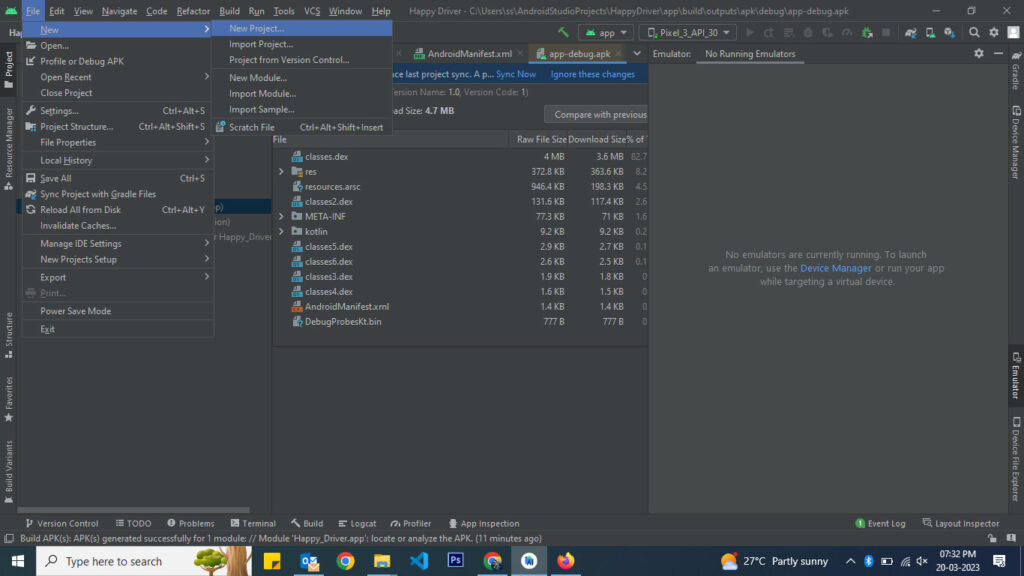
To create a new project in Android Studio click on File > New > New Project as show in the image below
click on Phone & Tablet and select Basic Activity template and click next as shown in the image below
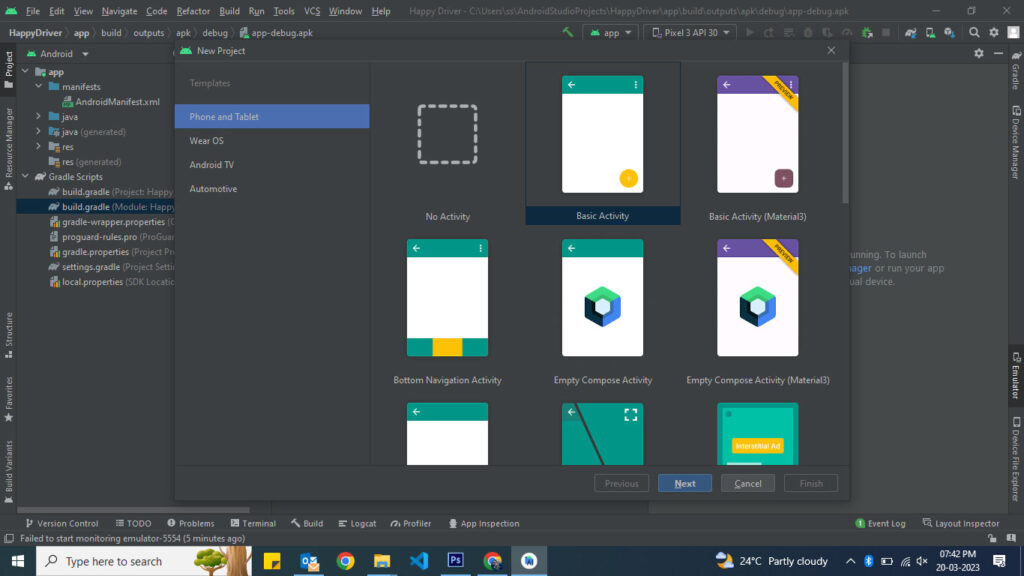
Now enter Project Name,Package name, and set Project Location at last Select Language as Java and click finish
Our new project has been created and ready to use in android studio
Now open manifest > AndroidManifest.xml file and add one line of code highlighted in image below
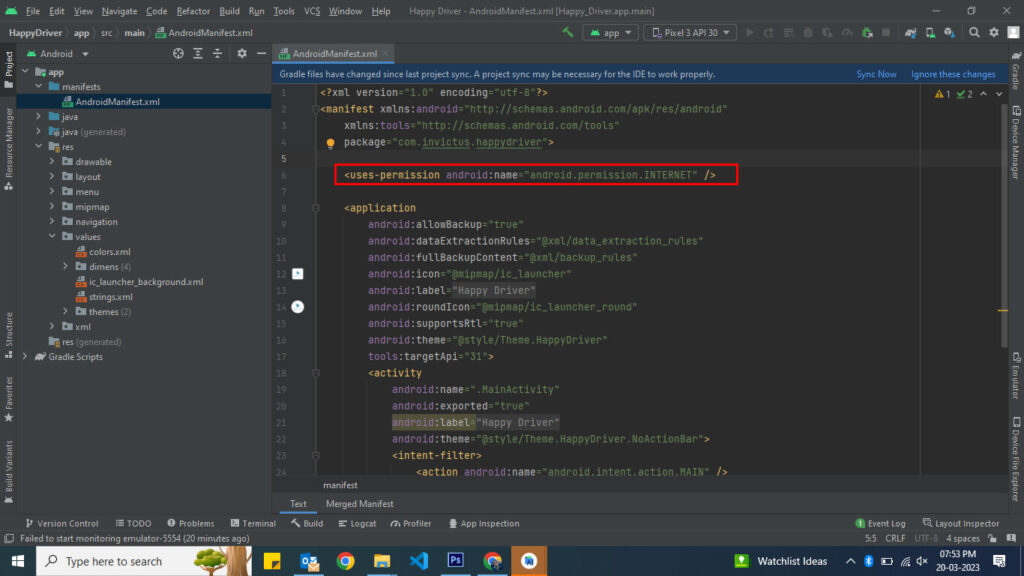
We have added this code to take permission to access the internet so that our WebView can work easily.
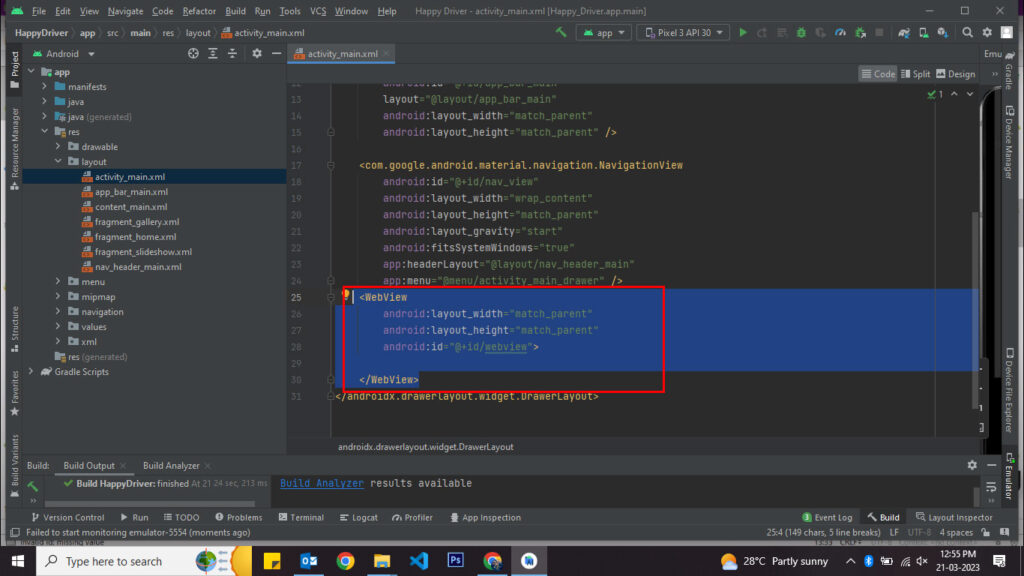
Now open res > layout >activity_main.xml file and add the code as highlighted in the image below
After that go to java > your_apps_package_name folder > MainActivity.java file and add below code in MainActivity class as shown in image
WebView webView;
webView=(WebView)findViewById(R.id.webview);
        WebSettings webSettings=webView.getSettings();
        webView.getSettings().setJavaScriptEnabled(true);
        webView.loadUrl("https://www.example.com");
        webView.setWebViewClient(new WebViewClient());
Note: Do not forget to add your website url instead of www.example.com
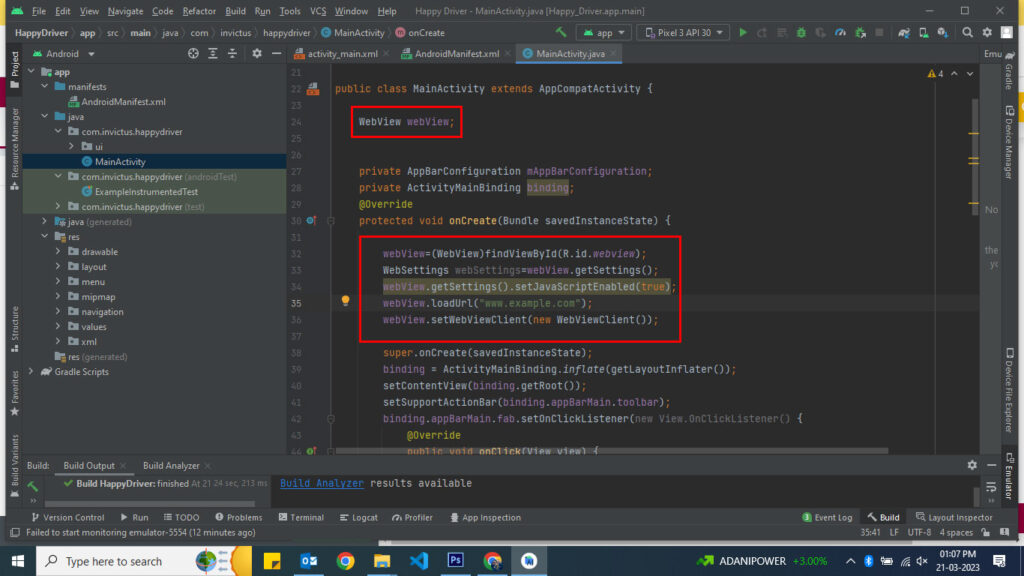
Finally add below code at ending of MainActivity class as shown in the image
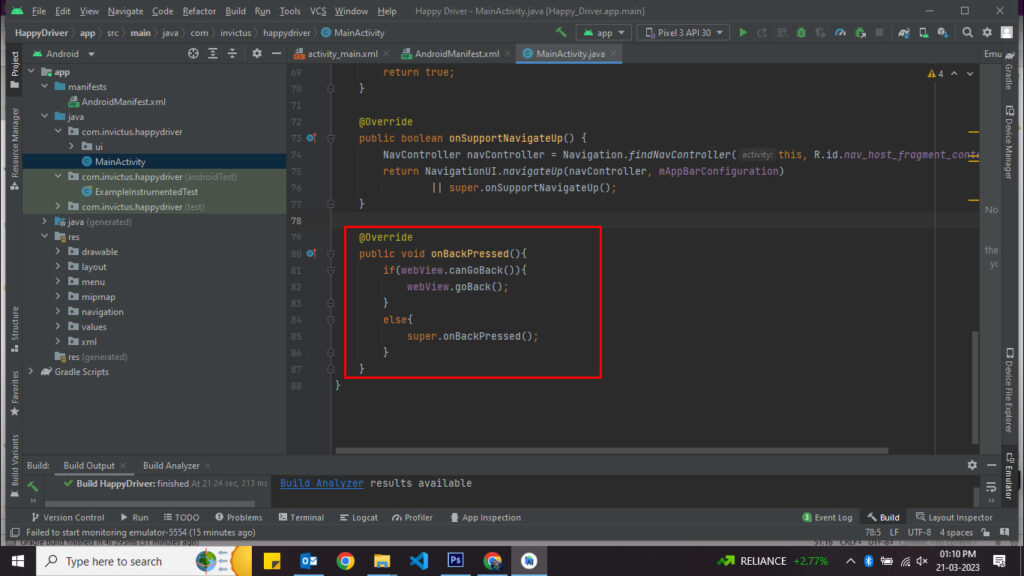
That’s all Now build your application and your apk will be ready to use
To build the apk click on Build > Build bundle(s) /Apk(s) > Build Apk(s) as shown in image below
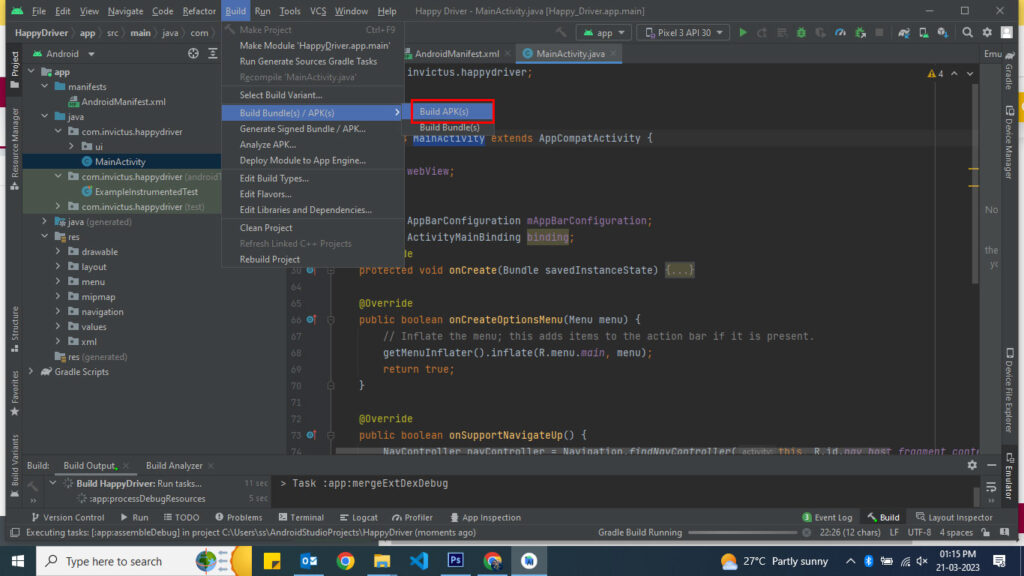
Hurray..!! Your apk is generated install it on virtual or physical device to check is everything is working fine.
It is the end of the article we have learned How to Convert Any Website to Android App in Android Studio.
Related Blogs

In this article we will learn how to create a splash screen for an Ionic capacitor application and how to add it to our ionic App.
